How one can Sew a Easy Backyard Apron (Free Sample) — Empress of Dust
This comfy backyard apron is a straightforward stitching undertaking, good for novices. It requires minimal material, could be sewn in a day, and features a free sample.
For those who get pleasure from easy stitching tasks, this gardening head scarf is one other favourite for warm summer season days.

Sew a Backyard Apron

This primary apron sample can be utilized to stitch aprons good for gardening, indoor seed beginning, housekeeping and extra.
In case your apron is for outside jobs that get muddy or moist, select a harder material like denim or canvas or outside curtain or upholstery material with some water-resistance.
For different duties, a crisp cotton material—both single or double-layers—works properly.
Considered one of my favourite aprons is comprised of a lined desk material (like those on the greenback retailer). It really works properly to guard my garments after I’m portray or staining DIY tasks.
About This Apron Design
Dimension
This apron is designed to suit a variety of sizes however I all the time suggest checking the measurements to make sure it fits your wants.
Design

This apron is a basic design utilizing one piece of material to type the bib and skirt. You could possibly additionally assemble it from two components for those who’re utilizing up smaller items of material.
There are two units of ties for the neck and waist.
The waist ties are fairly lengthy and supposed to wrap across the physique and tie on the entrance. For those who choose shorter ties, you’ll be able to all the time regulate them.
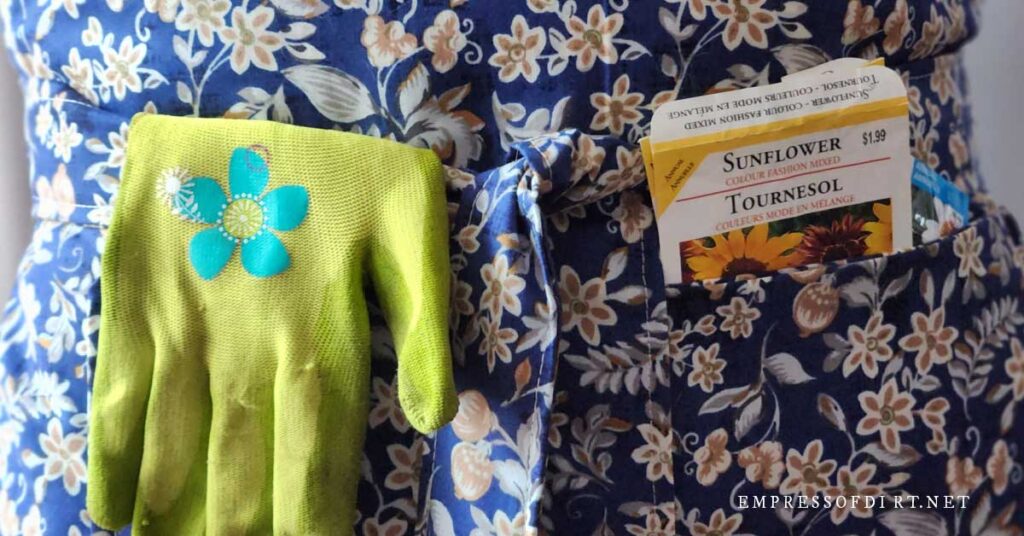
The pocket is comprised of a double thickness of material secured to the entrance of the skirt.
When you’ve made your first apron, I encourage you so as to add further options like clips, snaps, or buttons for the ties, belt loops, or a zippered pocket to your telephone, and any elaborations your coronary heart wishes like embroidery or patchwork.
Directions
Supplies
- 1.5 yards (54-inches lengthy) material (44-inches huge)
- thread
Provides
- Stitching machine & needles (suited to your material)
- Reducing mat
- Rotary cutter
- Ruler
- Scissors
- Pins or clips
- Tailor’s chalk or vanishing material pen
- Masking tape & marking pen
- Iron and ironing mat
- Free sample – apron bib template – see Assets
1Lower Material Items

Fold material
- Fold material lengthwise, improper sides collectively.
Draw minimize strains
Use tailer’s chalk or a vanishing material pen to mark your minimize strains.
- Apron (on fold): 34-inches lengthy x 14-inches huge.
- Waist ties: 54-inches lengthy x (roughly) 7-inches huge (material is folded = 2 items).
- (2) Neck ties (on fold): 14-inches huge x 2-inches lengthy ( =28-inches huge unfolded).
- Pocket (on fold): 14-inches huge x 8-inches lengthy (=16-inches unfolded).
Lower material items
Use a rotary cutter and mat or material scissors to chop out the material items.
- Lower (2) waist ties 54 x 7-inches. With material folded, you simply want to chop as soon as. Additionally trim off any selvages and guarantee your two waist tie items are the identical width and size.
- Lower apron 34 x 14-inches huge (on the fold). Precise piece will probably be 34 x 28-inches.
- Lower (2) neck ties: 14 x 2-inches. Every tie piece will probably be 28 x 2-inches.
- Lower pocket: 14 x 8-inches lengthy. Precise piece will probably be 28 x 8-inches.
2Label Material Items

Label every material piece. I take advantage of portray tape and a sharpie marker.
3Lower Apron Bib Curve

Material
To create the apron bib, begin with the apron material (34 x 14) proper aspect up with the fold in your proper.
Lower the Curve
Print out the free sample (see Assets) or freehand the curve based mostly on the measurements proven above.
The sample is a pdf file and makes use of 5 8.5×11-inch items of paper which you’ll tape collectively.
The highest of the bib ought to be 5-inches huge (on the fold = 10-inches huge).
The underside of the bib is 13-inches beneath the highest fringe of the bib.
You’re simply slicing the curve right here and nothing else.
Right here it’s after slicing:

The material piece with the blue APRON label on it (above) isn’t wanted and you may set it apart.
4Make Neck Ties

The best method to make ties is the double fold methodology. This hides uncooked edges.
We begin with two items of material 28-inches lengthy and 2-inches huge to make two ties.
With proper aspect down, fold every tie piece in half lengthwise (bringing improper sides collectively) and press it in place. This center crease will probably be your information line.
Within the pictures (above):
- The material has been folded lengthwise (improper sides collectively) and pressed, and the ends are additionally folded in ( a half-inch) and pressed in place.
- Subsequent, fold and press every lengthy aspect (a half inch) in to the center.
- Your tie is now 1″inch huge with one step to go.
- Fold in half yet another time and press in place.

Sew the neck ties shut by topstitching close to the sides as proven in picture. I take advantage of a zipper foot for this.
5Make Waist Ties
I discussed within the introduction that the waist ties are supposed to wrap across the physique and tie on the entrance. I do that as a result of they’re very comfy this fashion!
You may want them shorter. If that’s the case, you’ll be able to regulate the dimensions now or later.
To make the waist ties, we begin with two items of material every roughly 54 x 7-inches. For those who haven’t already, trim off any selvages.
The waist ties are created the identical manner we made the neck ties, however these are bigger.
With proper aspect down, fold and press every tie in half lengthwise (bringing improper sides collectively) to type a center crease.
Fold and press the ends in, roughly a half-inch every.
Fold and press every lengthy edge to fulfill on the center crease, then fold once more.
Your ties at the moment are 4 layers thick and roughly 1 3/4-inches huge (1.75-inches).

Topstitch all the way in which round as proven in picture above, roughly 1/4-inch from the sides.
6Hem Apron Bib Curves & High

The hems across the bib use an inch of material whole—a half-inch for the primary fold plus a half-inch for the second fold.
Place your apron material improper aspect up as proven above.
Fold (a half inch) and press every of the 2 curved edges.
Then, use small scissors to clip the folded material each inch or so, cautious to remain 1/8-inch away from the fold (see subsequent picture). It will make the hem lie good and flat.

Subsequent, fold (one other half-inch), press, and pin (or clip) to carry the hems in place.
Sew these hems in place by topstitching (on the proper aspect of the material) roughly 1/4-inch from the sting.
7Hem Apron Skirt Sides & Backside

With the curves hemmed, it’s time to hem to skirt sides.
Once more, together with your apron material proper aspect down, fold and press a half inch hem, after which do it once more to cover uncooked edges.
Maintain every little thing in place with pins (or clips) and topstitch in place on proper aspect of material utilizing a straight sew 1/4-inch from the sting.
Subsequent, earlier than creating the underside hem, with improper aspect dealing with up, fold in every nook (as proven beneath) and press in place. It will make a tidier hem.

The underside hem makes use of two inches of material (one-inch plus one-inch) double folded.
With apron material proper aspect down, fold backside hem one-inch (improper sides collectively), press, and fold once more (one-inch). Press and pin (or clip) in place.

Engaged on the proper aspect of the material, topstitch the hem straight throughout the apron, roughly 3/4-inch from the underside. Press in place.
Alternately, you possibly can hem the seam by hand.
Now we have now hemmed your entire apron.
8Make Pocket

As proven in Step 1, the pocket material is minimize on a fold. Open it up and place proper sides collectively with the 8-inch fold in your proper.
The outer pocket will probably be two layers thick for durability.
See the diagram (above) for these steps:
- Sew a half-inch seam all the way in which round aside from the part famous in picture 1 (above).
- Clip off every of the corners, near however not touching any stitches.
- Flip material proper aspect out and press. The lengthy aspect with the hole the place we didn’t sew will type the underside fringe of the pocket.
8Connect Pocket

Ignore the ties within the picture (above)—it’s greatest to stitch them on final, after the pocket is connected so that they don’t get in the way in which.
To put your pocket, with the apron material proper aspect up, find the waist of the apron and mark the middle level.
Additionally mark the middle level of the pocket.
Pin the pocket onto the apron skirt with the highest fringe of the pocket roughly 2-inches beneath the waist line, centered on the skirt.
Topstitch the pocket to the apron alongside three sides as proven within the picture (above). Reinforce your stitches (by backstitching) at every finish and nook.
Then topstitch down the center to divide the pocket in two.
9Connect Ties

Sew Neck Ties to Bib
With bib material proper aspect up, place a neck tie behind the highest bib nook, overlapping roughly one inch. Pin in place.
Topstitch in place. I prefer to sew a rectangle with an X inside.
Repeat for the second neck tie.
Subsequent we’ll connect the waist ties.

Sew Waist Ties to Skirt
With apron material proper aspect up, place a waist tie behind skirt (just under a aspect bib curve), overlapping roughly 1 3/4-inches (1.75-inches). The waist tie ought to be a scant 1/8-inch beneath the nook.
Topstitch the waist tie in place. I sew a rectangle with an X inside making certain the waist tie is firmly secured.
Repeat for 2nd waist tie.
Changes
Strive on the apron and regulate the waist ties if desired. If they’re too lengthy, simply clip the ends, fold within the uncooked edges, and topstitch in place.
Completed Apron
Right here is the completed apron.

Once more, I actually just like the wrap-around waist ties however to every her personal.

When you’ve made one, adapt the design nevertheless you want.
I prefer to preserve an apron helpful in all places I work—whether or not it’s within the house or backyard—so I can defend my garments—and get on with the work at hand.
Assets
Empress of Dirt
APRON BIB TEMPLATE

Enter your e mail to save lots of the file.
Becoming a member of our free e-newsletter record is optionally available at checkout.
- Stitching Machine | For this undertaking I used my Singer Quantum Stylist 9960.
~Melissa the Empress of Dust ♛